Difference between revisions of "Rail Crossing"
(→Areas) |
(Alternate walking route thats mostly safer and doesnt require TNT) |
||
| (17 intermediate revisions by 2 users not shown) | |||
| Line 26: | Line 26: | ||
Rail Crossing is accessible by the metro after the player has [[Find the drill parts|delivered the drill parts]] required to clear the collapsed south metro tunnel. The train won't take you directly to Rail Crossing during the faceless occupation. Once you arrive by train, follow the railway tracks south until you come to an intersection. From there, cross the rail and follow the tracks to west and you'll arrive in Rail Crossing. | Rail Crossing is accessible by the metro after the player has [[Find the drill parts|delivered the drill parts]] required to clear the collapsed south metro tunnel. The train won't take you directly to Rail Crossing during the faceless occupation. Once you arrive by train, follow the railway tracks south until you come to an intersection. From there, cross the rail and follow the tracks to west and you'll arrive in Rail Crossing. | ||
| − | You can also walk there, but you need at least one [[TNT Charge]] to clear the tunnels leading northwest from SGS.<br><br> | + | You can also walk there through [[Lower Underrail]], but you need at least one [[TNT Charge]] to clear the tunnels leading northwest from SGS. Alternatively after the metro tunnel is cleared you can walk there from [[South Railroad Outpost]] after taking the elevator in Junkyard, although you'll encounter two [[Lurkers]] right after the outpost, walking across the metro tracks ensures you won't fall victim to the traps across the route. <br><br> |
== Areas == | == Areas == | ||
| Line 40: | Line 40: | ||
* [[Captain Herve]] is carrying [[Private Quarters Key 4 (Rail Crossing)]] | * [[Captain Herve]] is carrying [[Private Quarters Key 4 (Rail Crossing)]] | ||
* [[Deacon]] is behind the secret door in the NE corner. He's carrying [[Security Keycard (Railcrossing Warehouse)]] | * [[Deacon]] is behind the secret door in the NE corner. He's carrying [[Security Keycard (Railcrossing Warehouse)]] | ||
| + | * [[Dude]] is in the bar and starts the quest [[Dude's vision]] | ||
=== Living Quarters === | === Living Quarters === | ||
| Line 55: | Line 56: | ||
** requires 80 [[Lockpicking]], or can be opened with [[Captain Herve]]'s [[Private Quarters Key 4 (Rail Crossing)]] | ** requires 80 [[Lockpicking]], or can be opened with [[Captain Herve]]'s [[Private Quarters Key 4 (Rail Crossing)]] | ||
* The metal door to the north: | * The metal door to the north: | ||
| − | ** Can be opened with | + | ** Can be opened with 50 effective [[Hacking]] on the nearby electronic lock, or by using [[Deacon]]'s [[Security Keycard (Railcrossing Warehouse)]] |
** Contains eight [[Old Money]] oddities, 2 XP | ** Contains eight [[Old Money]] oddities, 2 XP | ||
| + | |||
| + | === Railyard === | ||
| + | * Enemies [[Plasma Sentry]] and [[Faceless]] | ||
| + | ** The [[Plasma Sentry]] will be disabled if the quest [[Disable plasma walkers]] has been completed | ||
| + | * A trap door links the '''North tunnels''' to '''Buzzer's shop''' | ||
| + | * A locker in the room near the trap door contains a [[Train Driver Manual]] oddity, 1 XP | ||
| + | |||
| + | === Train Depot === | ||
| + | * Enemies [[Kamikaze Bot]]s and [[Plasma Sentry]] | ||
| + | ** They will be disabled if the quest [[Disable plasma walkers]] has been completed | ||
| + | * Has several [[HE Mine]] traps. They can be receovered with 67 [[Traps]] skill (possibly less) | ||
| + | * To the south is a fence door that can be opened with 50 [[Lockpicking]] | ||
| + | * The SW room: | ||
| + | ** Has a locker containing an [[Encyclopedia Fragment]] oddity, 1 XP | ||
| + | ** Has a trap door leading to the '''South Tunnels''' | ||
| + | * The NE surveillance room has a desk containing a [[Train Driver Manual]] oddity, 1 XP | ||
| + | * The door south of the NE surveillance room can be opened with 30 [[Hacking]] | ||
| + | * Has a [[Power Box]] of the east side, south of the surveillance room. It powers the security cameras | ||
| + | |||
| + | === South Tunnels === | ||
| + | * Accessed from the trap door to the south of the '''Train Depot''', or from the '''North Tunnels''' | ||
| + | * Enemies [[Burrower]]s and [[Spawn]]s | ||
| + | * The box in the center of the area requires 60 [[Hacking]] | ||
| + | * The pile of rubble near the northern exit contains an [[Obsidian Shard]] oddity, 1 XP | ||
| + | * One locker in the room to the north contains a unique [[Dragunov]] sniper rifle | ||
| + | * There are some [[Destructible objects|rocks]] in the NW that open a second way into the northern tunnels | ||
| + | |||
| + | === North Tunnels === | ||
| + | * Accessed from the '''Railyard''', or from the '''South Tunnels''' | ||
| + | * Enemies [[Burrower]]s and [[Spawn]]s | ||
| + | * The pile of rubble west of the central room has a [[Trilobite Fossil]] oddity, 1 XP | ||
| + | * The central room: | ||
| + | ** Has a respawning [[Lake Poppy]] | ||
| + | ** has a box requiring 60 [[Hacking]] | ||
| + | |||
| + | === Buzzer's Shop floor 1 === | ||
| + | * Enemies [[Plasma Sentry]] and [[Faceless]] | ||
| + | ** The [[Plasma Sentry]] will be disabled if the quest [[Disable plasma walkers]] has been completed | ||
| + | * The computer rack near the SE entrance has an [[Old Data Medium]] oddity, 1 XP | ||
| + | * The box in the storage room requires 70 [[Hacking]] | ||
| + | * The ventilation shaft has a ladder leading to the shafts on the 2nd floor | ||
| + | |||
| + | === Buzzer's Shop floor 2 === | ||
| + | * Enemies [[Hardware Bug]] (in ventilation shaft) and [[Faceless Mindreader]] | ||
| + | * The ventilation shaft have a secret passage (need [[Perception]]) leading to an area with a box requiring 50 [[Hacking]] | ||
| + | * The switch on the west wall turns the turrets on/off | ||
| + | * The [[Faceless Mindreader]] can be reasoned with (see quest [[Save Buzzer]]) and carries [[Holding Cell Key (Buzzer's Shop)]] | ||
| + | * The prison fence can be opened with 70 [[Lockpicking]] or with [[Holding Cell Key (Buzzer's Shop)]] | ||
| + | * The barrel in [[Buzzer]]'s cage contains a [[Strange Comm Device]] oddity, 1 XP | ||
== Quests == | == Quests == | ||
Latest revision as of 20:41, 19 November 2022
| Rail Crossing | |||||
A small peaceful community.
| |||||
|---|---|---|---|---|---|

| |||||
| Urban area information | |||||
| Music | Echoes of the City | ||||
| Located in | Lower Underrail | ||||
| Areas | Rail Crossing Railyard Train Depot Living Quarters Buzzer's Shop South Tunnel North Tunnel | ||||
| Connections | Lower Underrail | ||||
| Fast Travel | Lower Underrail metro (station) Rift (boxes near Buzzer's shop) | ||||
| NPCs | Captain Herve, Buzzer, Travis, Myles, Doc, Deacon, Deacon's Bodyguard, Mister Shady, Shady Lady, Barkeeper, Dude, Militiaman | ||||
| |||||
Rail Crossing is a town in south Lower Underrail.
Description
Rail Crossing is an independent town built inside an old train depot, northwest of South Gate Station. It is a frequent trading partner with South Gate Station and usually a relatively peaceful place.
Most of the townsfolk live on the north side of the westbound railway tracks. The railway yard on the south side has Buzzer's shop, which is initially under attack by the Faceless. Deacon's shop can be accessed by becoming "initiated", or passing a perception check (7) to notice its secret door in the alley behind the bar.
A unique sniper rifle, Dragunov, can be found in the old tunnels below the railway yard. A unique oddity, Old Money, can be found on a huge pile of old money inside an electronically locked warehouse in the Living Quarters area.
How to get there
Rail Crossing is accessible by the metro after the player has delivered the drill parts required to clear the collapsed south metro tunnel. The train won't take you directly to Rail Crossing during the faceless occupation. Once you arrive by train, follow the railway tracks south until you come to an intersection. From there, cross the rail and follow the tracks to west and you'll arrive in Rail Crossing.
You can also walk there through Lower Underrail, but you need at least one TNT Charge to clear the tunnels leading northwest from SGS. Alternatively after the metro tunnel is cleared you can walk there from South Railroad Outpost after taking the elevator in Junkyard, although you'll encounter two Lurkers right after the outpost, walking across the metro tracks ensures you won't fall victim to the traps across the route.
Areas
Rail Crossing
- In the barrel at the entrance by the bench is a Protectorate Propaganda oddity, 1 XP
- In the locker near Captain Herve is a Tunnel Hatch (Rail Crossing) key
- In Doc's storage room is a locker requiring 80 Lockpicking and containing some medicines
- Travis is carrying Private Quarters Key 1 (Rail Crossing)
- Myles is carrying Private Quarters Key 2 (Rail Crossing)
- Doc is carrying Private Quarters Key 3 (Rail Crossing)
- Captain Herve is carrying Private Quarters Key 4 (Rail Crossing)
- Deacon is behind the secret door in the NE corner. He's carrying Security Keycard (Railcrossing Warehouse)
- Dude is in the bar and starts the quest Dude's vision
Living Quarters
- The Power Box will turn on/off the lights in all the houses
- The house south of the courtyard with chairs:
- requires 80 Lockpicking, or can be opened with Travis' Private Quarters Key 1 (Rail Crossing)
- The house north of the courtyard with chairs:
- requires 80 Lockpicking, or can be opened with Doc's Private Quarters Key 3 (Rail Crossing)
- has a locker containing a Loaded Dice oddity, 1 XP
- The house south of the Power Box:
- requires 80 Lockpicking, or can be opened with Myles' Private Quarters Key 2 (Rail Crossing)
- has a desk containing a Strange Comm Device oddity, 1 XP
- The house east of the Power Box:
- requires 80 Lockpicking, or can be opened with Captain Herve's Private Quarters Key 4 (Rail Crossing)
- The metal door to the north:
- Can be opened with 50 effective Hacking on the nearby electronic lock, or by using Deacon's Security Keycard (Railcrossing Warehouse)
- Contains eight Old Money oddities, 2 XP
Railyard
- Enemies Plasma Sentry and Faceless
- The Plasma Sentry will be disabled if the quest Disable plasma walkers has been completed
- A trap door links the North tunnels to Buzzer's shop
- A locker in the room near the trap door contains a Train Driver Manual oddity, 1 XP
Train Depot
- Enemies Kamikaze Bots and Plasma Sentry
- They will be disabled if the quest Disable plasma walkers has been completed
- Has several HE Mine traps. They can be receovered with 67 Traps skill (possibly less)
- To the south is a fence door that can be opened with 50 Lockpicking
- The SW room:
- Has a locker containing an Encyclopedia Fragment oddity, 1 XP
- Has a trap door leading to the South Tunnels
- The NE surveillance room has a desk containing a Train Driver Manual oddity, 1 XP
- The door south of the NE surveillance room can be opened with 30 Hacking
- Has a Power Box of the east side, south of the surveillance room. It powers the security cameras
South Tunnels
- Accessed from the trap door to the south of the Train Depot, or from the North Tunnels
- Enemies Burrowers and Spawns
- The box in the center of the area requires 60 Hacking
- The pile of rubble near the northern exit contains an Obsidian Shard oddity, 1 XP
- One locker in the room to the north contains a unique Dragunov sniper rifle
- There are some rocks in the NW that open a second way into the northern tunnels
North Tunnels
- Accessed from the Railyard, or from the South Tunnels
- Enemies Burrowers and Spawns
- The pile of rubble west of the central room has a Trilobite Fossil oddity, 1 XP
- The central room:
- Has a respawning Lake Poppy
- has a box requiring 60 Hacking
Buzzer's Shop floor 1
- Enemies Plasma Sentry and Faceless
- The Plasma Sentry will be disabled if the quest Disable plasma walkers has been completed
- The computer rack near the SE entrance has an Old Data Medium oddity, 1 XP
- The box in the storage room requires 70 Hacking
- The ventilation shaft has a ladder leading to the shafts on the 2nd floor
Buzzer's Shop floor 2
- Enemies Hardware Bug (in ventilation shaft) and Faceless Mindreader
- The ventilation shaft have a secret passage (need Perception) leading to an area with a box requiring 50 Hacking
- The switch on the west wall turns the turrets on/off
- The Faceless Mindreader can be reasoned with (see quest Save Buzzer) and carries Holding Cell Key (Buzzer's Shop)
- The prison fence can be opened with 70 Lockpicking or with Holding Cell Key (Buzzer's Shop)
- The barrel in Buzzer's cage contains a Strange Comm Device oddity, 1 XP
Quests
Hadrian Tanner's Assist Rail Crossing quest leads you to the mayor, Captain Herve, who can explain the situation to you. By the time you arrive, most of the town is occupied by the Faceless.
Enemies
The Faceless have taken over Buzzer's Shop and the railway yard surrounding it.
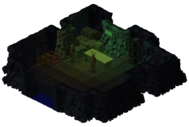
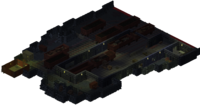
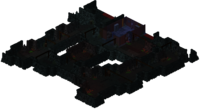
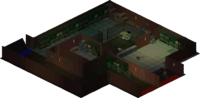
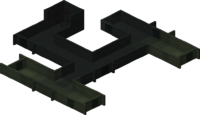
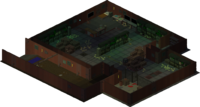
Map Gallery
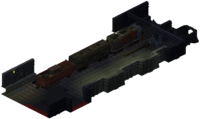
Arrival
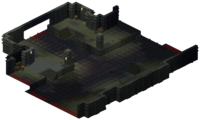
Junction
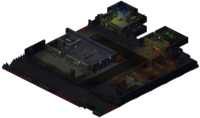
Rail Crossing
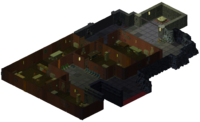
Living Quarters
Deacon's shop
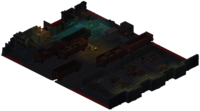
Railyard
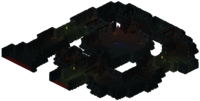
North tunnels
Train Depot
South tunnels
Buzzer's Shop floor 1
Shop floor 1 ventilation shafts
Buzzer's Shop floor 2
Shop floor 2 ventilation shafts


| |||||||||||||||||||||||||||||||||||||||||||||||||||||||||||