Difference between revisions of "Lower Underrail"
m (→Near Foundry) |
|||
| (28 intermediate revisions by 2 users not shown) | |||
| Line 31: | Line 31: | ||
Lower Underrail is accessible from [[South Gate Station]] level 1 exit. Most of the explorable areas are to the north from SGS, but there are a couple of areas to the south, including a wall breach leading to upper caves. However, most of Lower Underrail is initially inaccessible due to cave-ins caused by the recent earthquake. They can be visited later on, once the south metro tunnel is cleared and the player has access to [[TNT Charge]]s. | Lower Underrail is accessible from [[South Gate Station]] level 1 exit. Most of the explorable areas are to the north from SGS, but there are a couple of areas to the south, including a wall breach leading to upper caves. However, most of Lower Underrail is initially inaccessible due to cave-ins caused by the recent earthquake. They can be visited later on, once the south metro tunnel is cleared and the player has access to [[TNT Charge]]s. | ||
| − | |||
| − | |||
| − | |||
| − | |||
| − | |||
| − | |||
| − | |||
== Enemies == | == Enemies == | ||
| Line 68: | Line 61: | ||
</gallery> | </gallery> | ||
| − | === Near South Gate Station === | + | === Areas Near South Gate Station (Zone A) === |
Areas 5, 6, 7 and 8 east of South Gate Station are initially inaccessible, but can be explored once the player can clear the rocks blocking the way with [[TNT Charge]]s. | Areas 5, 6, 7 and 8 east of South Gate Station are initially inaccessible, but can be explored once the player can clear the rocks blocking the way with [[TNT Charge]]s. | ||
| + | |||
| + | ==== Lower Underrail A1 ==== | ||
| + | * The stairs down (exit in the NW corner) lead to [[Lower Passages]], area '''Underpassages A1''' | ||
| + | * North exits lead to area '''Lower Underrail A9''' | ||
| + | |||
| + | ==== Lower Underrail A4 ==== | ||
| + | * West exit leads to [[Upper Caves]] area '''Upper Caves A1''' | ||
| + | |||
| + | ==== Lower Underrail A6 ==== | ||
| + | * The north exit leads to area '''Lower Underrail A8''' | ||
| + | * The stairs in the NE lead down to [[Lower Passages]], area '''Underpassages A2''' | ||
| + | * The south exit leads to area '''Lower Underrail A7''' | ||
| + | * The west exit leads to area '''Lower Underrail A5''' | ||
| + | * Is inhabited by some [[Dog]], [[Lunatic Gunner]] and [[Lunatic Chiller]], the latter carrying [[Lunatic's Key]] | ||
| + | * The barrel contains a [[Strange Comm Device]] oddity, 1 XP | ||
| + | * There is a hidden footlocker by the rubble north of the tent | ||
| + | * The footlocker south of the tent requires 60 [[Lockpicking]] or [[Lunatic's Key]] | ||
| + | |||
| + | ==== Lower Underrail A7 ==== | ||
| + | * The north exit leads to area '''Lower Underrail A6''' | ||
| + | * The southwest exit leads down to [[Upper Caves]] area '''Upper Caves A12''' | ||
| + | * The lower box in SW area contains a [[Protectorate Propaganda]] oddity, 1 XP | ||
| + | * The upper box in SW area requires 60 [[Hacking]] | ||
| + | * The SE corner is habited by some [[Lurker Gunner]] and [[Lurker Cut-Throat]] | ||
| + | |||
| + | ==== Lower Underrail A9 ==== | ||
| + | * The south exit leads to area '''Lower Underrail A1''' | ||
| + | * The north exit leads to area '''Lower Underrail B1''' | ||
| + | * The west exit leads to [[Omega Station]], area '''Lower Underrail A11''' | ||
| + | * The east exit leads to area '''Lower Underrail A10''' | ||
<gallery widths=200px heights=127px> | <gallery widths=200px heights=127px> | ||
| Line 82: | Line 105: | ||
lu-a9.png | Lower Underrail A9 | lu-a9.png | Lower Underrail A9 | ||
lu-a10.png | Lower Underrail A10 | lu-a10.png | Lower Underrail A10 | ||
| − | lu-a11.png | Lower Underrail | + | lu-a11.png | Lower Underrail A11, [[Omega Station]] |
</gallery> | </gallery> | ||
| − | === Near Rail Crossing === | + | === Areas Near Rail Crossing (Zone B) === |
This part of Lower Underrail is near [[Rail Crossing]], to the northwest from South Gate Station. It becomes accessible once the player has access to metro travel and [[TNT Charge]]s. | This part of Lower Underrail is near [[Rail Crossing]], to the northwest from South Gate Station. It becomes accessible once the player has access to metro travel and [[TNT Charge]]s. | ||
==== Lower Underrail B6 ==== | ==== Lower Underrail B6 ==== | ||
* This area is empty, it simply links area B30, B34 and [[Warehouse Block Alpha]] 2 | * This area is empty, it simply links area B30, B34 and [[Warehouse Block Alpha]] 2 | ||
| + | * This is where the Free Drones wait for you to start the mission [[SRO assault]] | ||
==== Lower Underrail B7 ==== | ==== Lower Underrail B7 ==== | ||
* Has [[Ironhead Grenadier]] and [[Ironhead Bomber]] enemies | * Has [[Ironhead Grenadier]] and [[Ironhead Bomber]] enemies | ||
* Has a footlocker in the NW requiring 30 [[Lockpicking]] | * Has a footlocker in the NW requiring 30 [[Lockpicking]] | ||
| + | * South exit leads to area Lower Underrail B4 | ||
==== Lower Underrail B8 ==== | ==== Lower Underrail B8 ==== | ||
| Line 102: | Line 127: | ||
* Has [[Ironhead Gunner]], [[Ironhead Smasher]] and [[Ironhead Psionic]] | * Has [[Ironhead Gunner]], [[Ironhead Smasher]] and [[Ironhead Psionic]] | ||
* The footlocker on the west side contains an [[Old Train Schedule]] oddity, 1 XP | * The footlocker on the west side contains an [[Old Train Schedule]] oddity, 1 XP | ||
| + | * Barrel in the ironhead camp contains 3 cans of [[Gasoline]] | ||
==== Lower Underrail B10 ==== | ==== Lower Underrail B10 ==== | ||
| Line 108: | Line 134: | ||
* The southeast exit leads to area '''Lower Underrail B9''' | * The southeast exit leads to area '''Lower Underrail B9''' | ||
* The west exit (stairs down) leads to [[Lower Passages]], area '''Underpassages A6''' | * The west exit (stairs down) leads to [[Lower Passages]], area '''Underpassages A6''' | ||
| + | * There is a hidden unmarked footlocker at the south end of the west exit containing 100 charons | ||
==== Lower Underrail B10u1 ==== | ==== Lower Underrail B10u1 ==== | ||
| Line 115: | Line 142: | ||
** Is inhabited by [[Lurker Gunner]], [[Lurker Sniper]], [[Lurker Hunter]] and [[Lurker Psionic]] | ** Is inhabited by [[Lurker Gunner]], [[Lurker Sniper]], [[Lurker Hunter]] and [[Lurker Psionic]] | ||
** Is trapped by some [[Bear Trap]]s and [[Frag Mine]]s. They can be recovered with 61 [[Traps]] skill | ** Is trapped by some [[Bear Trap]]s and [[Frag Mine]]s. They can be recovered with 61 [[Traps]] skill | ||
| − | ** Has a box requiring 60 [[hacking]] | + | ** Has a box requiring 60 [[hacking]], containing a random psionic mentor |
| + | ** [[Flynn the Flayer]] is hiding here | ||
* The room in the SW corner: | * The room in the SW corner: | ||
** The door requires 45 [[Hacking]] | ** The door requires 45 [[Hacking]] | ||
| Line 155: | Line 183: | ||
==== Lower Underrail B27u ==== | ==== Lower Underrail B27u ==== | ||
| − | + | * The north exit leads to area '''Lower Underrail B27''' | |
| + | * The east exit leads to area '''Lower Underrail B32''' | ||
| + | * The buildings are guarded by a stealthy [[Lurker Hunter]] and a [[Lurker Gunslinger]] | ||
| + | * The south door of the corridor require 10 [[Lockpicking]] | ||
| + | * The footlocker requires 80 [[Lockpicking]] and contains a [[Psionic Mentor: Cryo-shield]] and some batteries | ||
==== Lower Underrail B28 ==== | ==== Lower Underrail B28 ==== | ||
| Line 165: | Line 197: | ||
==== Lower Underrail B29 ==== | ==== Lower Underrail B29 ==== | ||
* This area is accessible from area '''Lower Underrail B27''' when starting the [[Lost train]] quest from [[Captain Herve]] in [[Rail Crossing]] | * This area is accessible from area '''Lower Underrail B27''' when starting the [[Lost train]] quest from [[Captain Herve]] in [[Rail Crossing]] | ||
| − | |||
==== Lower Underrail B30 ==== | ==== Lower Underrail B30 ==== | ||
| Line 175: | Line 206: | ||
==== Lower Underrail B34 ==== | ==== Lower Underrail B34 ==== | ||
| − | + | * The north exit leads to area '''Lower Underrail B35''' | |
| + | * The south exit leads to area '''Lower Underrail B33''' | ||
| + | * The east exit leads to area '''Lower Underrail B6''' | ||
| + | * The left passage is inhabited by stealthy [[Lurker Cut-Throat]] and [[Lurker Assassin]] | ||
| + | * The cabinet in the left passage contains an [[Old Train Schedule]] oddity, 1 XP | ||
| + | |||
| + | ==== Lower Underrail B35 ==== | ||
| + | * The north exit leads to area '''Lower Underrail B36''' | ||
| + | * The south exit leads to area '''Lower Underrail B34''' | ||
| + | * The area is inhabited by a group of [[Ironhead Commando]], [[Ironhead Psionic]], [[Ironhead Cook]], [[Ironhead Demolisher]] and [[Dog]] | ||
| + | * There is a [[Frag Mine]] on each side of the passage | ||
| + | |||
| + | ==== Lower Underrail B39 ==== | ||
| + | * The west exit leads to area '''Lower Underrail B4''' | ||
| + | * The south exit leads to area '''Lower Underrail B37''' | ||
| + | * Is inhabited by [[Lurker Murderer]] and [[Lurker Hunter]] | ||
| + | * There is a [[Spirit Poison Bear Trap]] and a [[Crawler Poison Bear Trap]] | ||
| + | |||
<gallery widths=200px heights=127px> | <gallery widths=200px heights=127px> | ||
| − | |||
| − | |||
| − | |||
lu-b4.png | Lower Underrail B4 | lu-b4.png | Lower Underrail B4 | ||
lu-b4_1.png| Dude's warehouse | lu-b4_1.png| Dude's warehouse | ||
| Line 207: | Line 252: | ||
lu-b36.png | Lower Underrail B36 | lu-b36.png | Lower Underrail B36 | ||
lu-b37.png | Lower Underrail B37 | lu-b37.png | Lower Underrail B37 | ||
| + | lu-b39.png | Lower Underrail B39 | ||
</gallery> | </gallery> | ||
| − | === Near Foundry === | + | === Areas Near Foundry (Zone B) === |
This part of Lower Underrail is near [[Foundry]], to the north from South Gate Station and Rail Crossing. It becomes accessible once the player has access to metro travel and [[TNT Charge]]s. | This part of Lower Underrail is near [[Foundry]], to the north from South Gate Station and Rail Crossing. It becomes accessible once the player has access to metro travel and [[TNT Charge]]s. | ||
| + | |||
| + | ==== Lower Underrail B1 ==== | ||
| + | * There are some [[Destructible objects|destructible rocks]] blocking the way | ||
| + | * The south exit leads to area '''Lower Underrail A9''' | ||
| + | * The north exit leads to area '''Lower Underrail B14''' | ||
| + | * The west exit leads to area '''Lower Underrail B2''' | ||
| + | * The east exit is blocked by some [[Destructible objects|destructible rocks]], leads down to [[Upper Caves]] area '''Upper Caves B3''' | ||
| + | * Inhabited by some [[Rathound Alpha]]s | ||
| + | * There is a barrel containing a [[Protectorate Propaganda]] oddity, 1 XP | ||
| + | |||
| + | ==== Lower Underrail B2 ==== | ||
| + | * The west exit leads to area '''Lower Underrail B3''' | ||
| + | * The east exit leads to area '''Lower Underrail B1''' | ||
| + | * Inhabited by some non-hostile [[Bandit]]s | ||
| + | ** Leader of the bandits will demand player to pay a fee to pass through | ||
| + | ** If player leaves without paying, next time they speak to him, the fee will become higher | ||
| + | ** He can be intimidated with 50 effective [[Intimidation]] to let you pass for free | ||
| + | *** Intimidating him allows to loot the small room nearby without aggroing the bandits | ||
| + | ** Female characters can also [[Persuasion|persuade]] him to let you pass for free | ||
| + | * There is a footlocker (30 [[Lockpicking]]) containing a [[Marked Card Deck]] oddity, 2 XP | ||
| + | |||
| + | ==== Lower Underrail B14 ==== | ||
| + | * The south exit leads to area '''Lower Underrail B1''' | ||
| + | * The north exit leads to area '''Lower Underrail B40''' | ||
| + | * Inhabited by some [[Rathound Alpha]]s | ||
| + | * On the dead man in the middle of the area is a [["How to tame a rathound"]] oddity, 3 XP | ||
| + | |||
| + | ==== Lower Underrail B15 ==== | ||
| + | * The west exit leads to area '''Lower Underrail B20''' | ||
| + | * The south exit leads to area '''Lower Underrail B40''' | ||
| + | * The north exit leads to [[Lower Passages]], area '''Underpassages A10''' | ||
| + | * There is an Ironhead camp here | ||
| + | * [[Simon Peres]] can be found here, he carries [[Steyr-Auch]] unique assault rifle | ||
| + | * Shelves in Simon Peres' room contain [[Blueprint: Concussive Launcher Grenades]] | ||
| + | |||
| + | ==== Lower Underrail B19 ==== | ||
| + | * The north exit leads to area '''Lower Underrail B23''' | ||
| + | * The south exit leads to [[Warehouse Block Beta]], area '''NW Warehouse Block Beta''' | ||
| + | * Is inhabited by some Ironheads | ||
| + | * The locker near the cauldron requires 60 [[Lockpicking]] | ||
| + | * There is a [[Frag Mine]] and a [[Bear Trap]] on the east path | ||
| + | |||
| + | ==== Lower Underrail B20 ==== | ||
| + | * The north exit leads to area '''Lower Underrail B41''' | ||
| + | * The south exit leads to [[Warehouse Block Beta]], area | ||
| + | * The east exit leads to '''Lower Underrail B15''' | ||
| + | * Is inhabited by some [[Rathound]]s and a [[Rathound Alpha]] | ||
| + | * Has a respawning [[Cave Ear]]s | ||
==== Lower Underrail B22 ==== | ==== Lower Underrail B22 ==== | ||
| − | * The north exit leads to area | + | * The north exit leads to area '''Lower Underrail B22x''' |
* The west exit leads to area {{verify}} | * The west exit leads to area {{verify}} | ||
* The east exit leads to area '''Lower Underrail B23''' | * The east exit leads to area '''Lower Underrail B23''' | ||
| + | |||
| + | ==== Lower Underrail B22x ==== | ||
| + | * The south exit leads to area '''Lower Underrail B22''' | ||
| + | * This is where the [[Faceless]] for the quest [[Faceless recon]] are. They also give the quest [[Faceless' stolen object]] | ||
| + | * To the east is a hidden stash (need [[Perception]]) | ||
==== Lower Underrail B23 ==== | ==== Lower Underrail B23 ==== | ||
* The north exit leads to area '''Lower Underrail C2''' | * The north exit leads to area '''Lower Underrail C2''' | ||
* The west exit leads to area '''Lower Underrail B22''' | * The west exit leads to area '''Lower Underrail B22''' | ||
| − | * The south exit leads to area | + | * The south exit leads to area '''Lower Underrail B19''' |
* The east exit leads to area '''Lower Underrail B24''' | * The east exit leads to area '''Lower Underrail B24''' | ||
| Line 232: | Line 331: | ||
==== Lower Underrail B25 ==== | ==== Lower Underrail B25 ==== | ||
| − | * The north exit leads to area | + | * The north exit leads to area '''Lower Underrail C3''' |
* The west exit leads to area '''Lower Underrail B24''' | * The west exit leads to area '''Lower Underrail B24''' | ||
* The east exit leads to area '''Lower Underrail B26''' | * The east exit leads to area '''Lower Underrail B26''' | ||
==== Lower Underrail B26 ==== | ==== Lower Underrail B26 ==== | ||
| − | * The north exit leads to area | + | * The north exit leads to area '''Lower Underrail B26x''' |
* The west exit leads to area '''Lower Underrail B25''' | * The west exit leads to area '''Lower Underrail B25''' | ||
| − | * The south exit leads to area '''Lower Underrail | + | * The south exit leads to area '''Lower Underrail B42''' |
* There is an [[Ironhead Berserker]] and an [[Ironhead Heavy Gunner]] over the corpse of dead man | * There is an [[Ironhead Berserker]] and an [[Ironhead Heavy Gunner]] over the corpse of dead man | ||
| + | |||
| + | ==== Lower Underrail B26x ==== | ||
| + | * The south exit leads to area '''Lower Underrail B26''' | ||
| + | * This is where [[Hugo]] was taken prisoner for the quest [[Faceless' stolen object]] | ||
| + | |||
| + | ==== Lower Underrail B41 ==== | ||
| + | * The east exit leads to area '''Lower Underrail B42''' | ||
| + | * The south exit leads to area '''Lower Underrail B20''' | ||
| + | |||
| + | ==== Lower Underrail B42 ==== | ||
| + | * The north exit leads to area '''Lower Underrail B26''' | ||
| + | * The west exit leads to area '''Lower Underrail B41''' | ||
| + | * The outside area is inhabitant with [[Ironhead Commando]], [[Ironhead Bomber]], [[Ironhead Psionic]], [[Doberman]] | ||
| + | * The room: | ||
| + | ** [[MacLander]] is found here | ||
| + | ** Has a locker requiring 50 [[Lockpicking]] | ||
| + | * There are 2 [[HE Mine Mk II]]s and 2 [[Frag Mine Mk II]]s on the main path. They can be recovered with 94 [[Traps]] skill (possibly less) | ||
<gallery widths=200px heights=127px> | <gallery widths=200px heights=127px> | ||
| + | lu-b1.png | Lower Underrail B1 | ||
| + | lu-b2.png | Lower Underrail B2 | ||
| + | lu-b3.png | Lower Underrail B3 | ||
lu-b14.png | Lower Underrail B14 ([["How to tame a rathound"]] book) | lu-b14.png | Lower Underrail B14 ([["How to tame a rathound"]] book) | ||
lu-b15.png | Lower Underrail B15, Ironhead railway camp | lu-b15.png | Lower Underrail B15, Ironhead railway camp | ||
| Line 261: | Line 380: | ||
lu-b26x.png | Lower Underrail B26X, Bandit cave (Hugo) | lu-b26x.png | Lower Underrail B26X, Bandit cave (Hugo) | ||
lu-b38.png | Lower Underrail B38 | lu-b38.png | Lower Underrail B38 | ||
| − | |||
lu-b40.png | Lower Underrail B40 | lu-b40.png | Lower Underrail B40 | ||
lu-b41.png | Lower Underrail B41 | lu-b41.png | Lower Underrail B41 | ||
| Line 267: | Line 385: | ||
</gallery> | </gallery> | ||
| − | === North of Foundry === | + | === Areas North of Foundry (Zone C)=== |
This part of Lower Underrail is located north of [[Foundry]] and east of [[Core City]]. | This part of Lower Underrail is located north of [[Foundry]] and east of [[Core City]]. | ||
==== Lower Underrail C1 ==== | ==== Lower Underrail C1 ==== | ||
* The north exit leads to area '''Lower Underrail C4''' | * The north exit leads to area '''Lower Underrail C4''' | ||
| − | * The | + | * The west exit leads to [[RAF 013]] |
| − | * The south exit leads to area | + | * The south exit leads to area '''Lower Underrail B21''' |
* The east area iss inhabited by a few [[Lunatics]] | * The east area iss inhabited by a few [[Lunatics]] | ||
* The footlocker near the lunatics contains a [[Bubblegum]] oddity, 1 XP | * The footlocker near the lunatics contains a [[Bubblegum]] oddity, 1 XP | ||
| Line 288: | Line 406: | ||
* The footlocker by the lunatics contains an [[Old World Booze Bottle]] oddity, 2 XP | * The footlocker by the lunatics contains an [[Old World Booze Bottle]] oddity, 2 XP | ||
* The barrel by the lunatics contains a [[Bubblegum]] oddity, 1 XP | * The barrel by the lunatics contains a [[Bubblegum]] oddity, 1 XP | ||
| + | |||
| + | ==== Lower Underrail C3 ==== | ||
| + | * The nort exit leads to area '''Lower Underrail C8''' | ||
| + | * The south exit leads to area '''Lower Underrail B25''' | ||
| + | * Is inhabited by a few [[Dog]]s | ||
| + | * Desk contains a [[Train Log]] oddity, 1 XP | ||
==== Lower Underrail C4 ==== | ==== Lower Underrail C4 ==== | ||
| Line 322: | Line 446: | ||
* The west exit leads to area '''Lower Underrail C10''' | * The west exit leads to area '''Lower Underrail C10''' | ||
* The north exit leads to area '''Lower Underrail C9''' | * The north exit leads to area '''Lower Underrail C9''' | ||
| − | * The south exit leads to area | + | * The south exit leads to area '''Lower Underrail C3''' |
* Is inhabited by [[Rathound]]s and [[Rathound Alpha]] | * Is inhabited by [[Rathound]]s and [[Rathound Alpha]] | ||
| Line 328: | Line 452: | ||
* The south exit leads to area '''Lower Underrail C8''' | * The south exit leads to area '''Lower Underrail C8''' | ||
* The north exit leads to [[Hecate Research Outpost]] | * The north exit leads to [[Hecate Research Outpost]] | ||
| − | * A passage down lead to | + | * A passage down lead to to [[Upper Caves]] area '''Upper Caves C6''' |
==== Lower Underrail C10 ==== | ==== Lower Underrail C10 ==== | ||
Latest revision as of 14:00, 29 November 2023
| Lower Underrail | |||||
Lower metro system of South Underrail. It used to connect mostly industrial facilities.
| |||||
|---|---|---|---|---|---|

| |||||
| Major location information | |||||
| Music | Searchlight Journey | ||||
| Located in | Underrail | ||||
| Areas | Lower Underrail | ||||
| Connections | Under-passages Upper Caves GMS warehouse block Warehouse Block Alpha Abandoned Warehouse Warehouse Block Beta Hecate Research Outpost Stations: | ||||
| Fast Travel | Lower metro (South Gate Station) Lower metro (Rail Crossing) Lower metro (Foundry) Lower metro (Core City) | ||||
| NPCs | Blaine, Jack Quicksilver | ||||
| |||||
Lower Underrail is a huge derelict urban area consisting of over 60 zones between major locations. Above it is Upper Underrail, below it are Lower Caves and further down are the Deep Caverns.
Some caves are higher up and directly connected to Lower Underrail, these are known as Upper Caves.
Also immediately below Lower Underrail are under-passages, a network of smaller service tunnels and escape routes.
Description
The Lower Underrail was the industrial/military zone of the underground metro before the dissolution of Biocorp. It consists of sprawling main tunnels, metro tunnels and beneath them are smaller escape routes and other accessways. Various stations, towns, other settlements, abandoned complexes and industrial facilities reside in the Lower Underrail. Some wall breaches also lead to adjoining Upper Caves.
Lower Underrail is accessible from South Gate Station level 1 exit. Most of the explorable areas are to the north from SGS, but there are a couple of areas to the south, including a wall breach leading to upper caves. However, most of Lower Underrail is initially inaccessible due to cave-ins caused by the recent earthquake. They can be visited later on, once the south metro tunnel is cleared and the player has access to TNT Charges.
Enemies
Rathounds are a common sight and various, usually hostile, human outcasts have small camps all over the Lower Underrail.
- Critters
- Rathounds, Rathound Alphas, Dogs, Burrower Spawn, Pigs, Warthogs
- Ironheads
- Ironhead Grenadiers (lvl10), Ironhead Gunners (lvl10), Ironhead Smashers (lvl10), Ironhead Psionics (lvl15)
- Lunatics
- Lunatic Brawlers (lvl10), Lunatic Chillers (lvl10), Lunatic Gunners (lvl10), Lunatic Pyromaniacs (lvl15)
- Lurkers
- Lurker Cut-Throats (lvl10), Lurker Gunners (lvl10), Lurker Gunslingers (lvl15), Lurker Hunters (lvl15), Lurker Murderers (lvl15)
- Other humans
- Bandits (during Jack's delivery job quest), Free Drones bandits (during lost train quest)
Quests
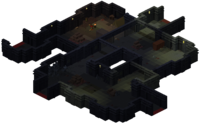
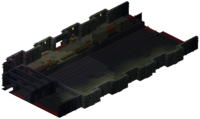
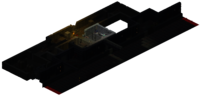
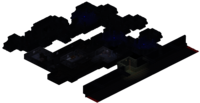
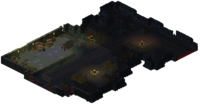
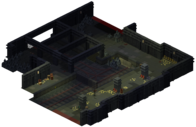
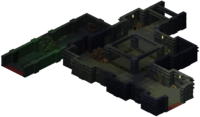
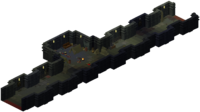
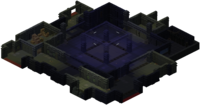
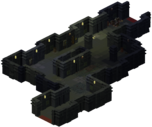
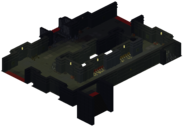
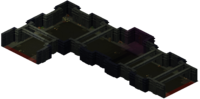
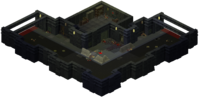
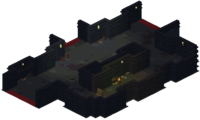
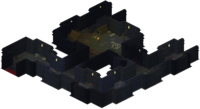
Map Gallery
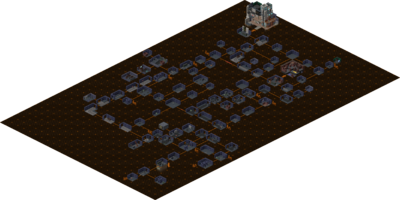
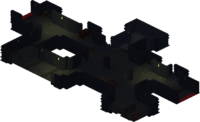
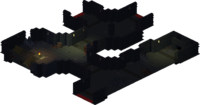
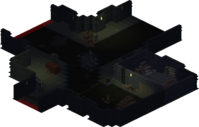
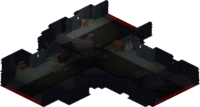
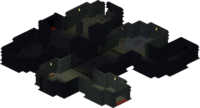
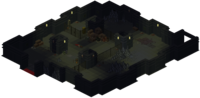
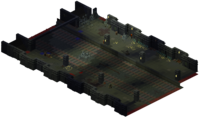
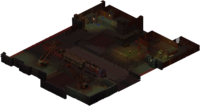
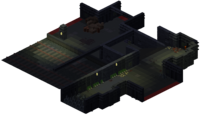
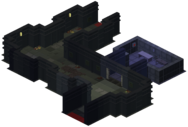
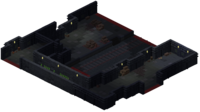
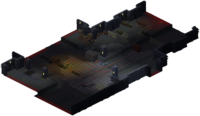
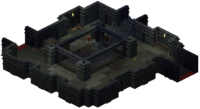
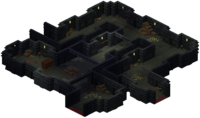
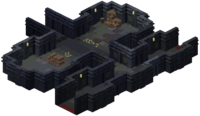
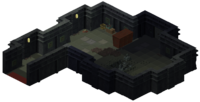
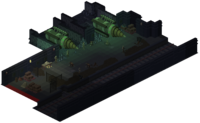
Lower Underrail Global Map
Areas Near South Gate Station (Zone A)
Areas 5, 6, 7 and 8 east of South Gate Station are initially inaccessible, but can be explored once the player can clear the rocks blocking the way with TNT Charges.
Lower Underrail A1
- The stairs down (exit in the NW corner) lead to Lower Passages, area Underpassages A1
- North exits lead to area Lower Underrail A9
Lower Underrail A4
- West exit leads to Upper Caves area Upper Caves A1
Lower Underrail A6
- The north exit leads to area Lower Underrail A8
- The stairs in the NE lead down to Lower Passages, area Underpassages A2
- The south exit leads to area Lower Underrail A7
- The west exit leads to area Lower Underrail A5
- Is inhabited by some Dog, Lunatic Gunner and Lunatic Chiller, the latter carrying Lunatic's Key
- The barrel contains a Strange Comm Device oddity, 1 XP
- There is a hidden footlocker by the rubble north of the tent
- The footlocker south of the tent requires 60 Lockpicking or Lunatic's Key
Lower Underrail A7
- The north exit leads to area Lower Underrail A6
- The southwest exit leads down to Upper Caves area Upper Caves A12
- The lower box in SW area contains a Protectorate Propaganda oddity, 1 XP
- The upper box in SW area requires 60 Hacking
- The SE corner is habited by some Lurker Gunner and Lurker Cut-Throat
Lower Underrail A9
- The south exit leads to area Lower Underrail A1
- The north exit leads to area Lower Underrail B1
- The west exit leads to Omega Station, area Lower Underrail A11
- The east exit leads to area Lower Underrail A10
Lower Underrail A1, connects to SGS, GMS warehouses, Alpha warehouses, Under-passages
Lower Underrail A2
Lower Underrail A3

Lower Underrail A4, connects to Upper Caves
Lower Underrail A5
Lower Underrail A6

Lower Underrail A7, connects to Upper Caves
Lower Underrail A8
Lower Underrail A9
Lower Underrail A10
Lower Underrail A11, Omega Station


Areas Near Rail Crossing (Zone B)
This part of Lower Underrail is near Rail Crossing, to the northwest from South Gate Station. It becomes accessible once the player has access to metro travel and TNT Charges.
Lower Underrail B6
- This area is empty, it simply links area B30, B34 and Warehouse Block Alpha 2
- This is where the Free Drones wait for you to start the mission SRO assault
Lower Underrail B7
- Has Ironhead Grenadier and Ironhead Bomber enemies
- Has a footlocker in the NW requiring 30 Lockpicking
- South exit leads to area Lower Underrail B4
Lower Underrail B8
Lower Underrail B9
- Has Ironhead Gunner, Ironhead Smasher and Ironhead Psionic
- The footlocker on the west side contains an Old Train Schedule oddity, 1 XP
- Barrel in the ironhead camp contains 3 cans of Gasoline
Lower Underrail B10
- The north exits leads to area Rail Crossing, area Junction
- The southwest exit leads to area Lower Underrail B10u1
- The southeast exit leads to area Lower Underrail B9
- The west exit (stairs down) leads to Lower Passages, area Underpassages A6
- There is a hidden unmarked footlocker at the south end of the west exit containing 100 charons
Lower Underrail B10u1
- The north exit leads to area Lower Underrail B10
- The south exit leads to area Lower Underrail B10u2
- The west area:
- Is inhabited by Lurker Gunner, Lurker Sniper, Lurker Hunter and Lurker Psionic
- Is trapped by some Bear Traps and Frag Mines. They can be recovered with 61 Traps skill
- Has a box requiring 60 hacking, containing a random psionic mentor
- Flynn the Flayer is hiding here
- The room in the SW corner:
- The door requires 45 Hacking
- A Crawler and Death Stalker are lurking in that room
Lower Underrail B10u2
- The north exit leads to area Lower Underrail B10u1
- The south exit leads to area Lower Underrail B28
- The ladder leads to a second, dark part of the tunnels
- It has several Crawlers and Death Stalkers hiding in the shadows
- The destructible rocks lead to the northern part, but it's also possible to walk around it
- The room with the skeleton in the center:
- Has a switch to light the room, making the Death Stalker avoid it
- Has a box requiring 60 Hacking
- The natural cave to the north:
- The slope down leads to area Black Crawler's nest
- 3 respawning Mindshrooms
- 4 respawning Cave Ears
Black Crawler's nest
- The slope up leads to area Lower Underrail B10u2
- A Black Crawler is hiding in the shadows
- 3 respawning Mindshrooms
- A skeleton has a Blueprint: Contaminated Bullets
Lower Underrail B12
- This area is the Rail Crossing metro(train) station providing instant travel (for 25 Charons) to:
Lower Underrail B13
- Has a respawning Mindshroom
Lower Underrail B27
- The north exit leads to area Lower Underrail B28
- The south exit leads to area Lower Underrail B27u
- The western exit becomes available with the Lost train quest from Captain Herve in Rail Crossing. It leads to area Lower Underrail B29
Lower Underrail B27u
- The north exit leads to area Lower Underrail B27
- The east exit leads to area Lower Underrail B32
- The buildings are guarded by a stealthy Lurker Hunter and a Lurker Gunslinger
- The south door of the corridor require 10 Lockpicking
- The footlocker requires 80 Lockpicking and contains a Psionic Mentor: Cryo-shield and some batteries
Lower Underrail B28
- The north exit leads to area Lower Underrail B10u2
- The south exit leads to area Lower Underrail B27
- The eastexit leads to area Lower Underrail B8
- The fenced area to the south can be opened with 55 Lockpicking
Lower Underrail B29
- This area is accessible from area Lower Underrail B27 when starting the Lost train quest from Captain Herve in Rail Crossing
Lower Underrail B30
- Has stealthy Lurker Cut-Throats
- The southern exit leads to South Railroad Outpost
Lower Underrail B33
- This area is empty, it simply links area B30, B32 and B34
Lower Underrail B34
- The north exit leads to area Lower Underrail B35
- The south exit leads to area Lower Underrail B33
- The east exit leads to area Lower Underrail B6
- The left passage is inhabited by stealthy Lurker Cut-Throat and Lurker Assassin
- The cabinet in the left passage contains an Old Train Schedule oddity, 1 XP
Lower Underrail B35
- The north exit leads to area Lower Underrail B36
- The south exit leads to area Lower Underrail B34
- The area is inhabited by a group of Ironhead Commando, Ironhead Psionic, Ironhead Cook, Ironhead Demolisher and Dog
- There is a Frag Mine on each side of the passage
Lower Underrail B39
- The west exit leads to area Lower Underrail B4
- The south exit leads to area Lower Underrail B37
- Is inhabited by Lurker Murderer and Lurker Hunter
- There is a Spirit Poison Bear Trap and a Crawler Poison Bear Trap
Lower Underrail B4
Dude's warehouse
Lower Underrail B5
Lower Underrail B6
Lower Underrail B7
Lower Underrail B8, connects to Under-passages
Lower Underrail B9
Lower Underrail B10, connects to Under-passages (hidden footlocker at the south end)
Lower Underrail B10U1, dark metro tunnels between Rail Crossing and SRO
Lower Underrail B10U2, dark metro tunnels between Rail Crossing and SRO
Lower Underrail B10U2
Lower Underrail B10U2, black crawler nest
Lower Underrail B11, connects to Rail Crossing
Lower Underrail B12, Rail Crossing station
Lower Underrail B13, connects to Abandoned Warehouse
Lower Underrail B27
Lower Underrail B27U, dark metro tunnels near SRO
Lower Underrail B28
Secluded Station (Lower Underrail B29)
Lower Underrail B30, outside South Railroad Outpost
Lower Underrail B32, dark metro tunnels near SRO
Lower Underrail B33, dark metro tunnels near SRO
Lower Underrail B34
Lower Underrail B35
Lower Underrail B36
Lower Underrail B37
Lower Underrail B39


Areas Near Foundry (Zone B)
This part of Lower Underrail is near Foundry, to the north from South Gate Station and Rail Crossing. It becomes accessible once the player has access to metro travel and TNT Charges.
Lower Underrail B1
- There are some destructible rocks blocking the way
- The south exit leads to area Lower Underrail A9
- The north exit leads to area Lower Underrail B14
- The west exit leads to area Lower Underrail B2
- The east exit is blocked by some destructible rocks, leads down to Upper Caves area Upper Caves B3
- Inhabited by some Rathound Alphas
- There is a barrel containing a Protectorate Propaganda oddity, 1 XP
Lower Underrail B2
- The west exit leads to area Lower Underrail B3
- The east exit leads to area Lower Underrail B1
- Inhabited by some non-hostile Bandits
- Leader of the bandits will demand player to pay a fee to pass through
- If player leaves without paying, next time they speak to him, the fee will become higher
- He can be intimidated with 50 effective Intimidation to let you pass for free
- Intimidating him allows to loot the small room nearby without aggroing the bandits
- Female characters can also persuade him to let you pass for free
- There is a footlocker (30 Lockpicking) containing a Marked Card Deck oddity, 2 XP
Lower Underrail B14
- The south exit leads to area Lower Underrail B1
- The north exit leads to area Lower Underrail B40
- Inhabited by some Rathound Alphas
- On the dead man in the middle of the area is a "How to tame a rathound" oddity, 3 XP
Lower Underrail B15
- The west exit leads to area Lower Underrail B20
- The south exit leads to area Lower Underrail B40
- The north exit leads to Lower Passages, area Underpassages A10
- There is an Ironhead camp here
- Simon Peres can be found here, he carries Steyr-Auch unique assault rifle
- Shelves in Simon Peres' room contain Blueprint: Concussive Launcher Grenades
Lower Underrail B19
- The north exit leads to area Lower Underrail B23
- The south exit leads to Warehouse Block Beta, area NW Warehouse Block Beta
- Is inhabited by some Ironheads
- The locker near the cauldron requires 60 Lockpicking
- There is a Frag Mine and a Bear Trap on the east path
Lower Underrail B20
- The north exit leads to area Lower Underrail B41
- The south exit leads to Warehouse Block Beta, area
- The east exit leads to Lower Underrail B15
- Is inhabited by some Rathounds and a Rathound Alpha
- Has a respawning Cave Ears
Lower Underrail B22
- The north exit leads to area Lower Underrail B22x
- The west exit leads to areaVerify
- The east exit leads to area Lower Underrail B23
Lower Underrail B22x
- The south exit leads to area Lower Underrail B22
- This is where the Faceless for the quest Faceless recon are. They also give the quest Faceless' stolen object
- To the east is a hidden stash (need Perception)
Lower Underrail B23
- The north exit leads to area Lower Underrail C2
- The west exit leads to area Lower Underrail B22
- The south exit leads to area Lower Underrail B19
- The east exit leads to area Lower Underrail B24
Lower Underrail B24
- The north exit leads to the Foundry, area Central Foundry
- The west exit leads to area Lower Underrail B23
- The east exit leads to area Lower Underrail B25
- Leonie is a metal component merchant
- The desk near Leonie contains a Foundry Plans oddity, 1 XP
- The footlocker near Leonie contains a Skeleton Visor oddity, 2 XP
Lower Underrail B25
- The north exit leads to area Lower Underrail C3
- The west exit leads to area Lower Underrail B24
- The east exit leads to area Lower Underrail B26
Lower Underrail B26
- The north exit leads to area Lower Underrail B26x
- The west exit leads to area Lower Underrail B25
- The south exit leads to area Lower Underrail B42
- There is an Ironhead Berserker and an Ironhead Heavy Gunner over the corpse of dead man
Lower Underrail B26x
- The south exit leads to area Lower Underrail B26
- This is where Hugo was taken prisoner for the quest Faceless' stolen object
Lower Underrail B41
- The east exit leads to area Lower Underrail B42
- The south exit leads to area Lower Underrail B20
Lower Underrail B42
- The north exit leads to area Lower Underrail B26
- The west exit leads to area Lower Underrail B41
- The outside area is inhabitant with Ironhead Commando, Ironhead Bomber, Ironhead Psionic, Doberman
- The room:
- MacLander is found here
- Has a locker requiring 50 Lockpicking
- There are 2 HE Mine Mk IIs and 2 Frag Mine Mk IIs on the main path. They can be recovered with 94 Traps skill (possibly less)
Lower Underrail B1
Lower Underrail B2
Lower Underrail B3
Lower Underrail B14 ("How to tame a rathound" book)
Lower Underrail B15, Ironhead railway camp
Lower Underrail B16, connects to Warehouse Block Beta
Lower Underrail B17
Lower Underrail B18
Lower Underrail B19, Ironhead checkpoint, connects to Warehouse Block Beta
Lower Underrail B20, connects to Upper Caves, Warehouse Block Beta
Lower Underrail B21, connects to Upper Caves
Lower Underrail B22, West-east tracks

Lower Underrail B22X, Faceless group
Lower Underrail B22U, dark metro tunnels between Foundry and Core City

Lower Underrail B23, West-east tracks
Lower Underrail B24, Foundry railyard
Lower Underrail B25, West-east tracks
Lower Underrail B26, East of Foundry
Lower Underrail B26X, Bandit cave (Hugo)
Lower Underrail B38
Lower Underrail B40
Lower Underrail B41
Lower Underrail B42


Areas North of Foundry (Zone C)
This part of Lower Underrail is located north of Foundry and east of Core City.
Lower Underrail C1
- The north exit leads to area Lower Underrail C4
- The west exit leads to RAF 013
- The south exit leads to area Lower Underrail B21
- The east area iss inhabited by a few Lunatics
- The footlocker near the lunatics contains a Bubblegum oddity, 1 XP
Lower Underrail C1B
- The south exit leads to area Lower Underrail C5
- Is inhabited by many Faceless
Lower Underrail C2
- The northeast exit leads to area Lower Underrail C7
- The northwest exit leads to area Lower Underrail C11
- The south exit leads to area Lower Underrail B23
- Is inhabited by a few Lunatics
- The footlocker by the lunatics contains an Old World Booze Bottle oddity, 2 XP
- The barrel by the lunatics contains a Bubblegum oddity, 1 XP
Lower Underrail C3
- The nort exit leads to area Lower Underrail C8
- The south exit leads to area Lower Underrail B25
- Is inhabited by a few Dogs
- Desk contains a Train Log oddity, 1 XP
Lower Underrail C4
- The east exit leads to area Lower Underrail C11
- The north exit leads to area Lower Underrail C5
- The southwest exit leads to area Lower Underrail C1
- The south exit near the metro rail leads to areaVerify
- Is inhabited by a few Rathound and Rathound Alpha
- The barrel in the northeast contains a Fancy Lighter oddity, 2 XP
- The barrel in the southwest contains a Train Log oddity, 1 XP
Lower Underrail C5
- The west exit leads to Core City Lower Level, area Core City Gates
- The north exit leads to area Lower Underrail C1B
- The east exit leads to area Lower Underrail C6
- The south exit leads to area Lower Underrail C4
- The barrel near the Praetorians contains a Biocorp Technology Catalog Fragment oddity, 1 XP
Lower Underrail C6
- The west exit leads to area Lower Underrail C5
- The east exit leads to area Lower Underrail C7
- The junk pile contains an Old World Booze Bottle oddity, 2 XP
Lower Underrail C7
- The west exit leads to area Lower Underrail C6
- The east exit leads to area Lower Underrail C10
- The south exit leads to area Lower Underrail C2
- The south area:
- Is inhabited by Dog, Ironhead Bomber and Ironhead Demolisher
- Is trapped with 5 HE Mine Mk II. They can be recovered with 100 Traps skill.
- In the barrel near the ironheads is a Train Log oddity, 1 XP
Lower Underrail C8
- The west exit leads to area Lower Underrail C10
- The north exit leads to area Lower Underrail C9
- The south exit leads to area Lower Underrail C3
- Is inhabited by Rathounds and Rathound Alpha
Lower Underrail C9
- The south exit leads to area Lower Underrail C8
- The north exit leads to Hecate Research Outpost
- A passage down lead to to Upper Caves area Upper Caves C6
Lower Underrail C10
- The west exit leads to area Lower Underrail C7
- The east exit leads to area Lower Underrail C8
- Is inhabited by several Lurkers (Lurker Hunter, Lurker Gunslinger, Lurker Psionic, Lurker Trapper)
- Is trapped with 7 Bear Traps. They can be recovered with 100 Traps skill
- The box contains a Fancy Lighter oddity, 2 XP
Lower Underrail C11
- The south exit leads to area Lower Underrail C2
- The west exit leads to area Lower Underrail C4
- Is trapped with 3 Burrower Poison Bear Traps and 1 Bear Trap. You need 100 Traps to recover all all them.
Lower Underrail C1, connects to RAF 013
Lower Underrail C2
Lower Underrail C3, medical room
Lower Underrail C4
Lower Underrail C5, Core City outskirts (hidden footlocker at the northeast corner)
Lower Underrail C6
Lower Underrail C7
Lower Underrail C8
Lower Underrail C9, connects to Upper Caves and Hecate Research Outpost
Core City outskirts, tunnels leading to north Underrail
Lower Underrail C10
Lower Underrail C11


| |||||||||||||||||||||||||||||||||||||||||||||||||||||||||||